Conservation treatment of The Crucifixion panel by Master of the Legend of Saint Lucy
This month, Chief Conservator of The Phoebus Foundation Sven Van Dorst tells us about the conservation treatment of The Crucifixion panel by Master of the Legend of Saint Lucy. He masterfully describes how this work was created, where the stylistic influences come from, and what the damage phenomena can teach us. The power of this restoration emerges when we get closer to the heart of it through research techniques Sven employs in the process.

Before restoration
“This small panel depicting the crucifixion was painted by the Master of the Lucia Legend. His work is close to that of Hans Memling, so it is assumed that he was active in Bruges at the end of the 15th century. Based on an inscription on the back of the panel, we discovered that the little work ended up in Portugal during the 19th century in the collection of the Dukes of Palmella.”


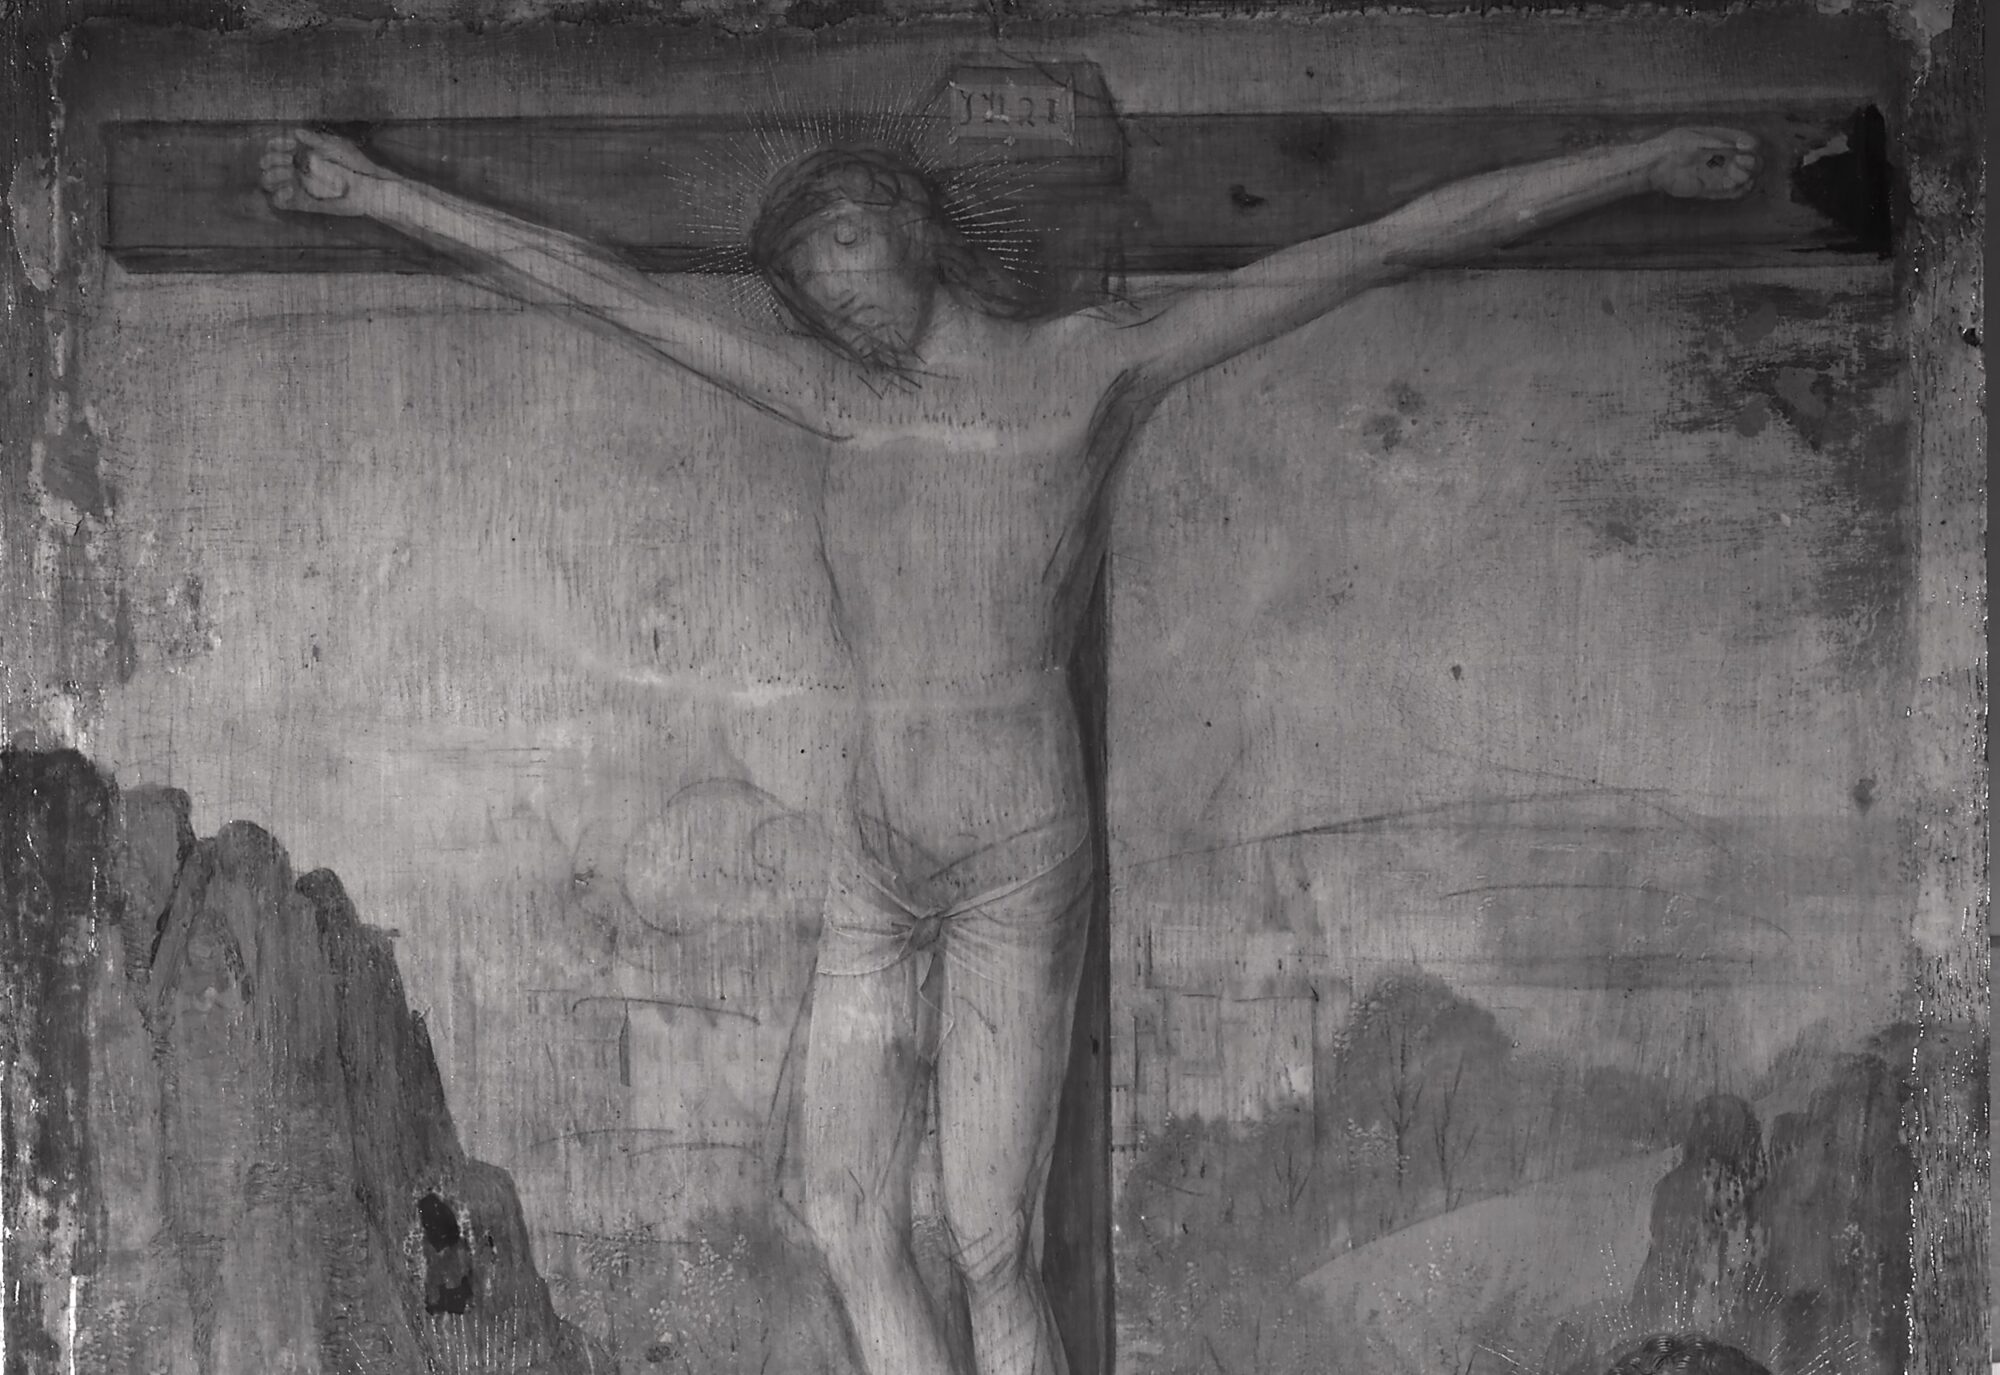
“Before the restoration began, the painting looked dull. The colors had a greenish appearance because the varnish was heavily discolored. With the help of Infrared Reflectography (IRR) and radiography (X-ray), it was possible to evaluate the condition of the painting in detail. As a result, we found out that the edges of the painting were completely overpainted. Originally, there was a border of about 1cm of unpainted wood around the work. This is typical of 15th-century paintings because the wooden panel was held in the frame using a groove. On the IRR, we can see some minor damage in the paint layer and the underdrawing that the painter used to draw his composition on the panel. The lines are angular, indicating the use of a “dry” drawing medium such as chalk.”

“After the examination, the restoration could finally begin. It took some work to remove the old layers of varnish. Using homemade gels, the varnish could be swollen in several stages and removed from the paint surface with a cotton swab. Immediately, the original vibrant colors and some of the old damage reappeared. In the next stage, the old overpaintings at the edges were removed. This was done under the microscope to avoid damaging the underlying paint.”
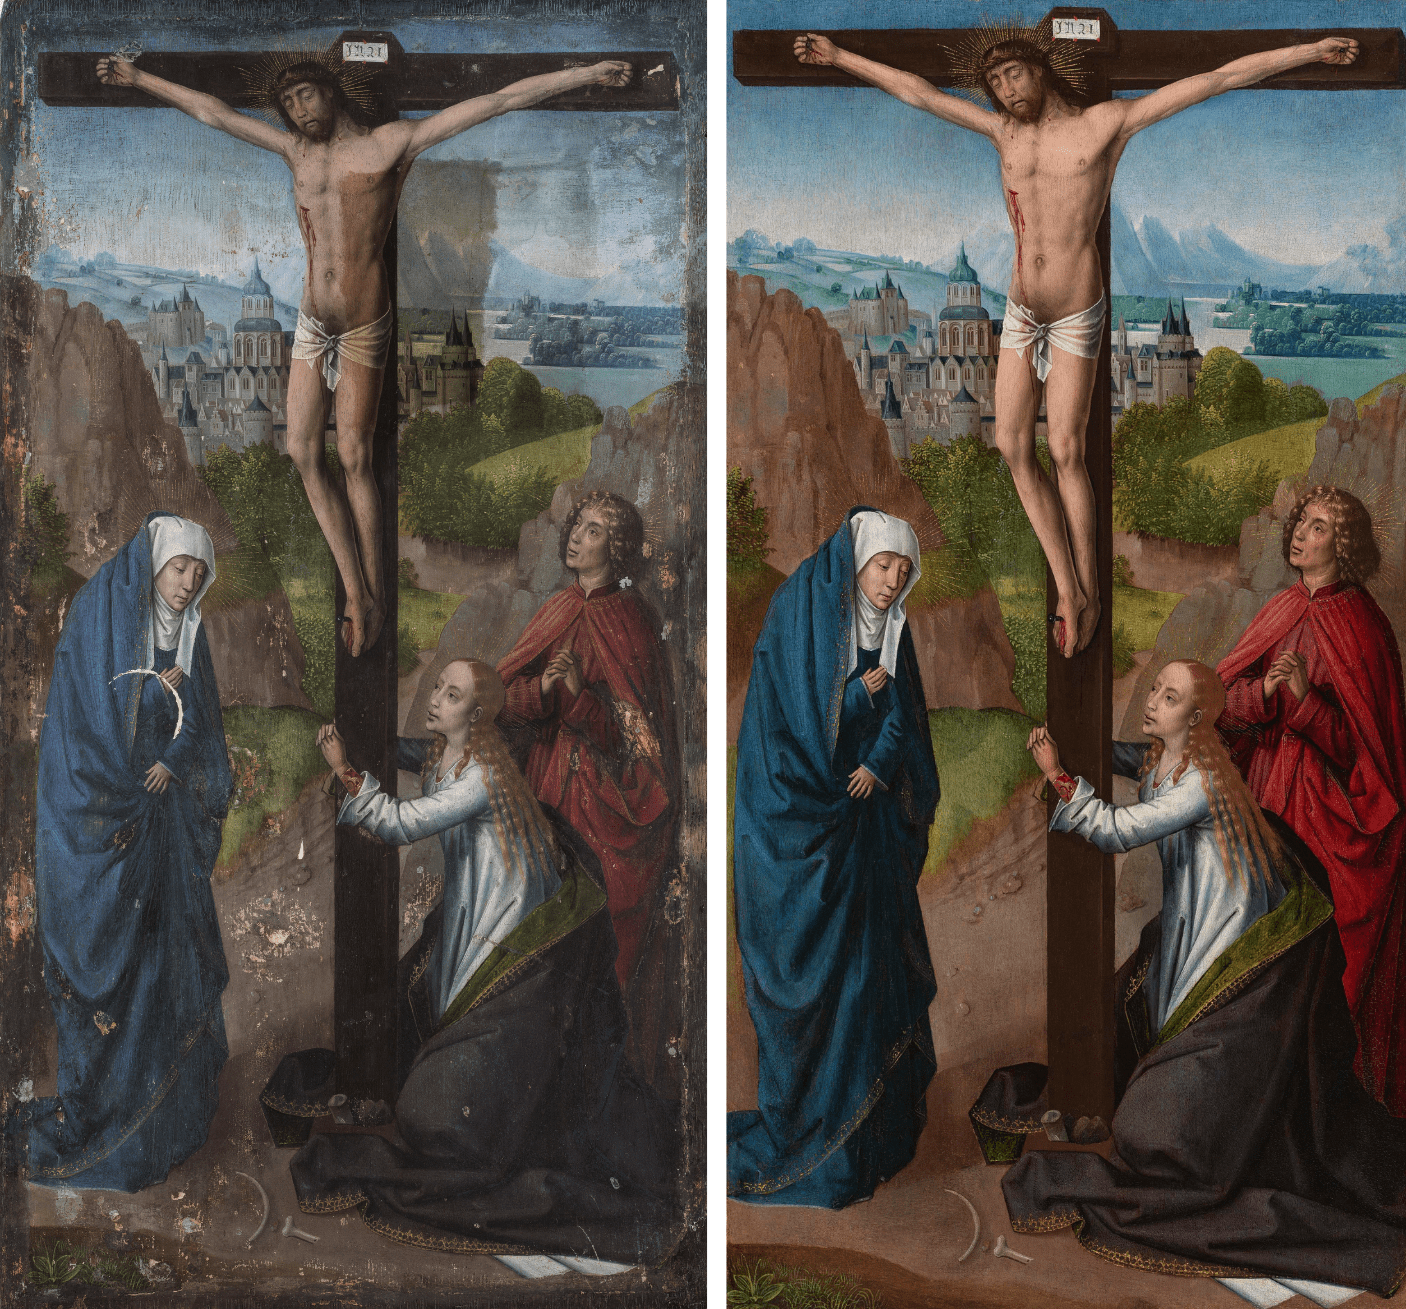
“Once the original surface was exposed again, the final phase of treatment could begin. First, a varnish was applied to protect the original. Next, gaps were filled and retouched to no longer stand out. The result was stunning and one of my most enjoyable projects. Now it is again possible to appreciate the refined technique and palette of the mysterious Master of the Lucia Legend.”
